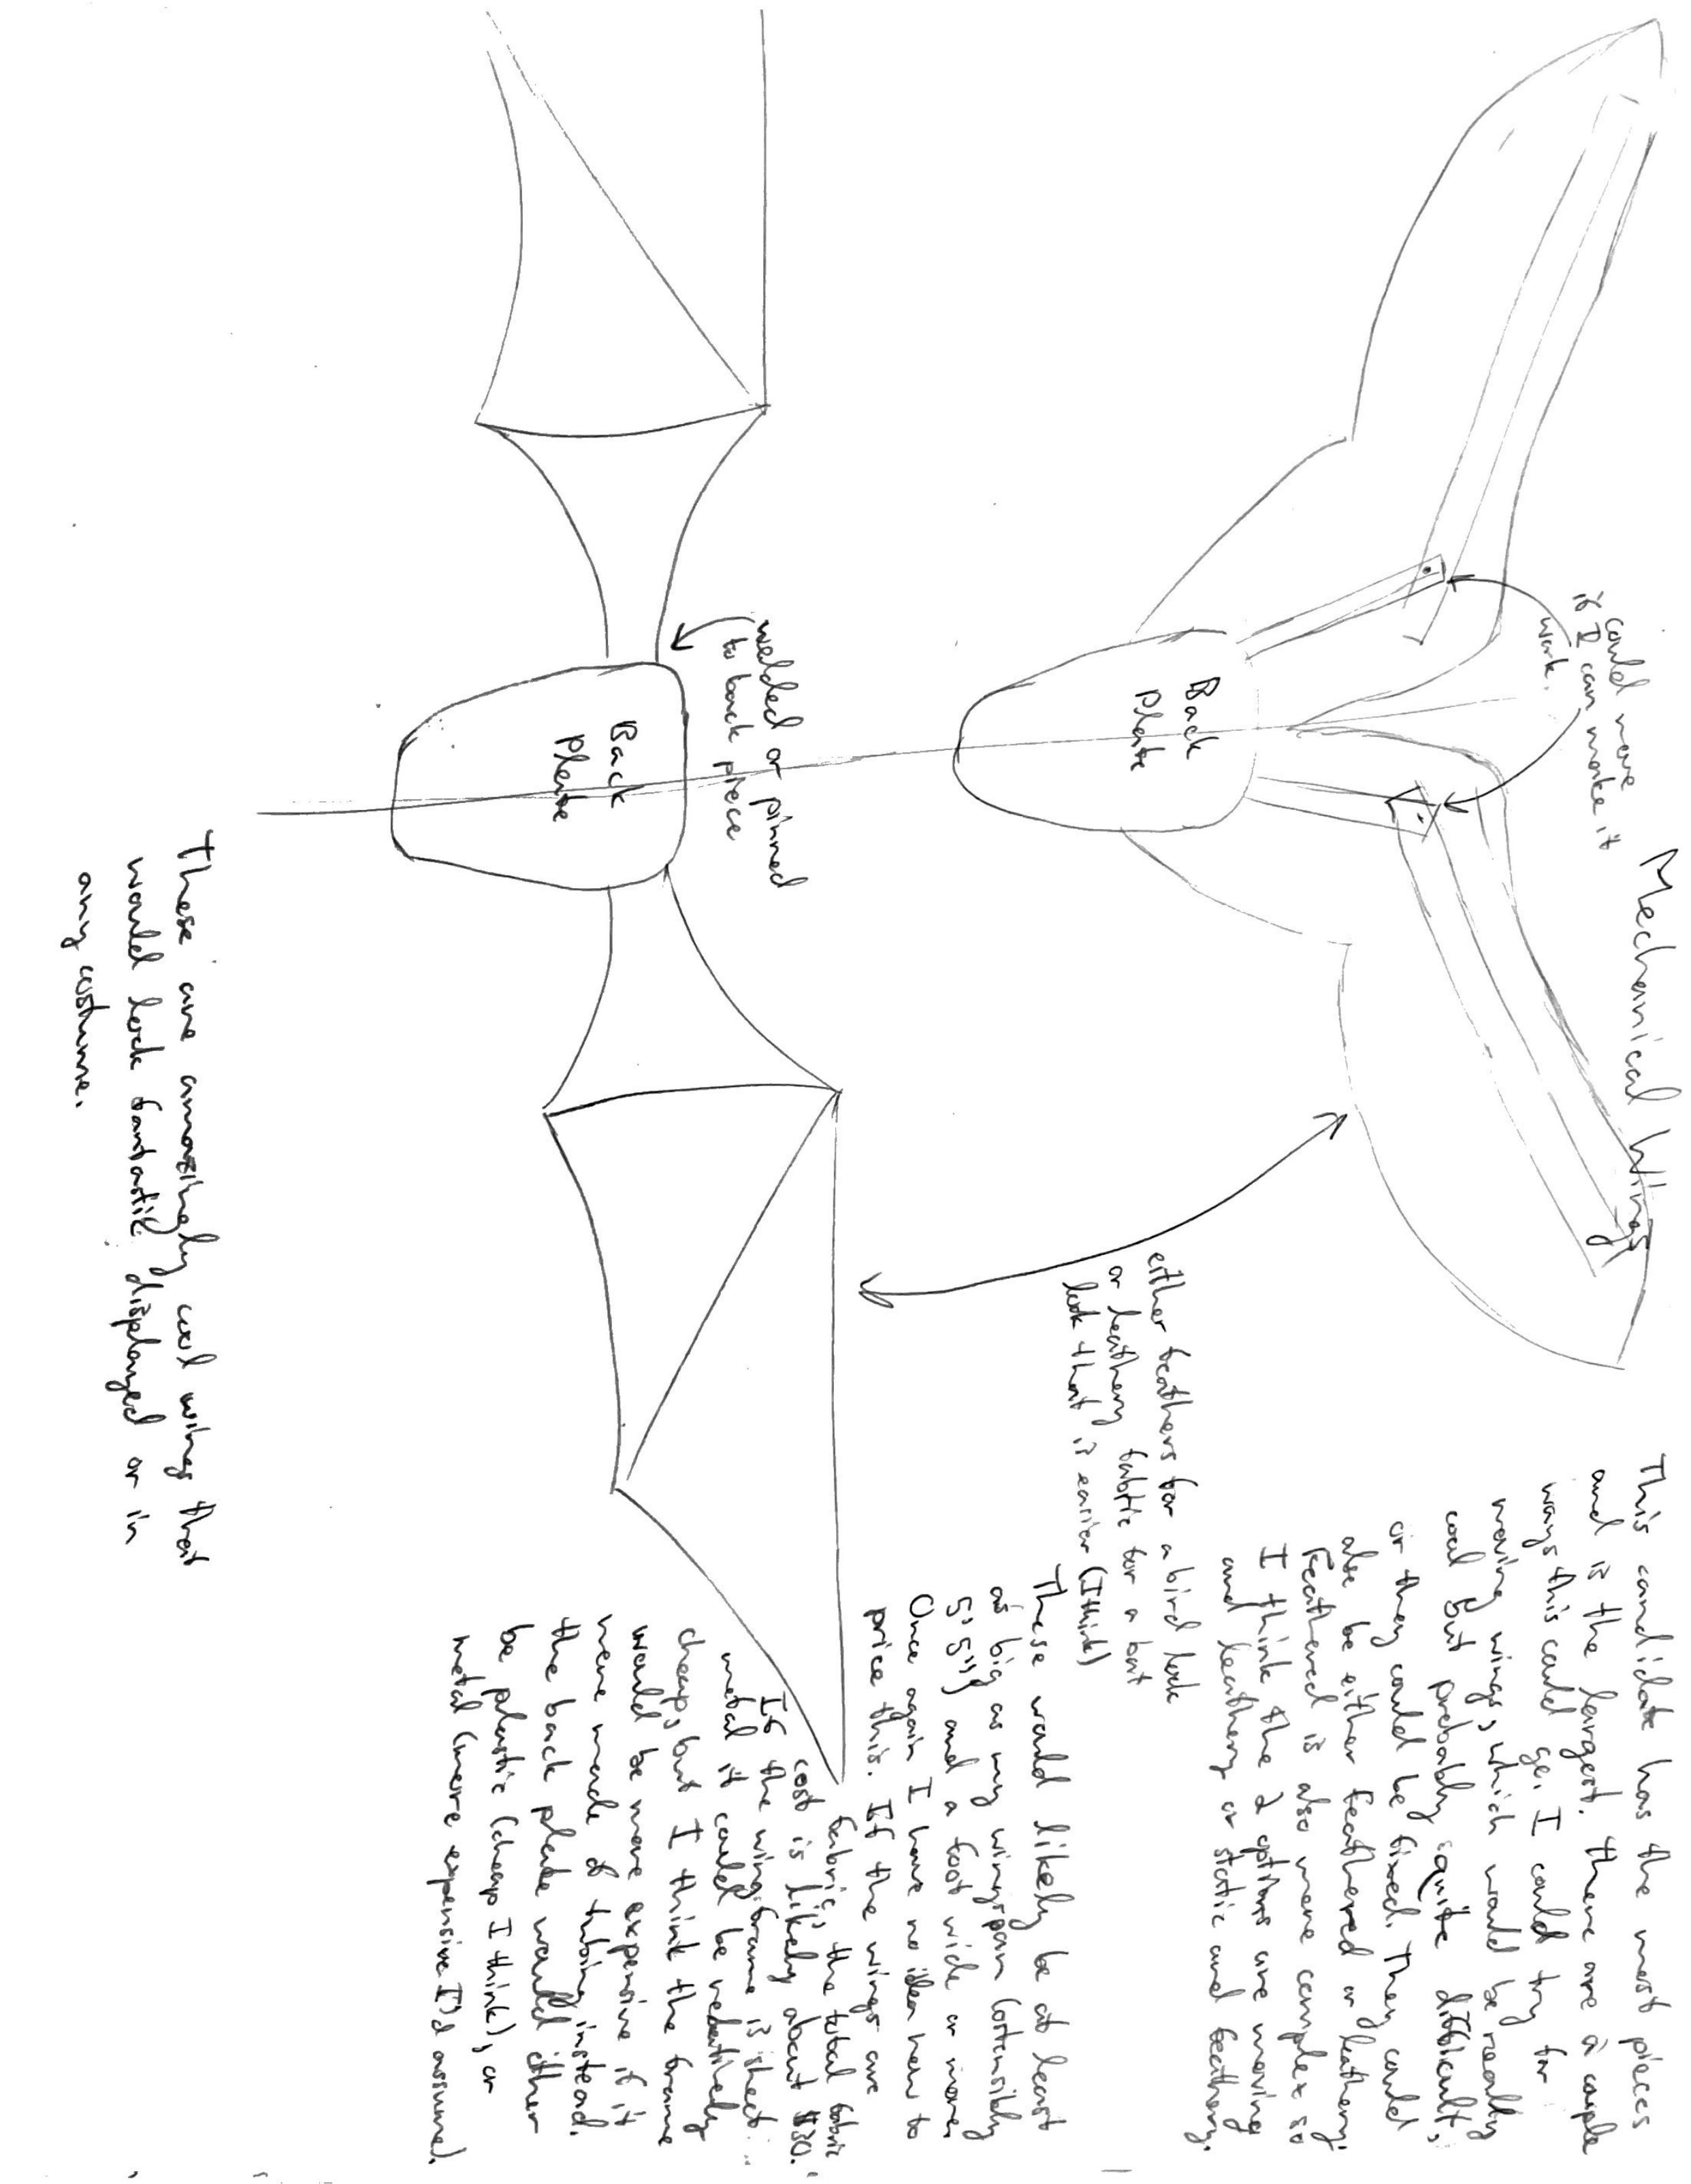
First concept sketch for the project
 My first set of drawings were very complicated, consisting of over 70 feathers, an internal frame for support, and an unknown way to attach each wing to the central back piece. I had wanted to layer the feathers like the picture on the left, but I wasn't sure how I would be able to attach the feathers together, as you cannot braise aluminum. The sheer number of parts that sort of wing would require also posed a problem, considering I had less than 10 weeks to make the piece, and it needed to not be too heavy to wear. I had also considered making the wings fold down for storage, or a less obtrusive wearing position using a locking mechanism in the backpiece. I eventually decided against due to time constraints and because I didn't think trying to test a mechanism while also figuring out how to attach the feathers together would be very effective.
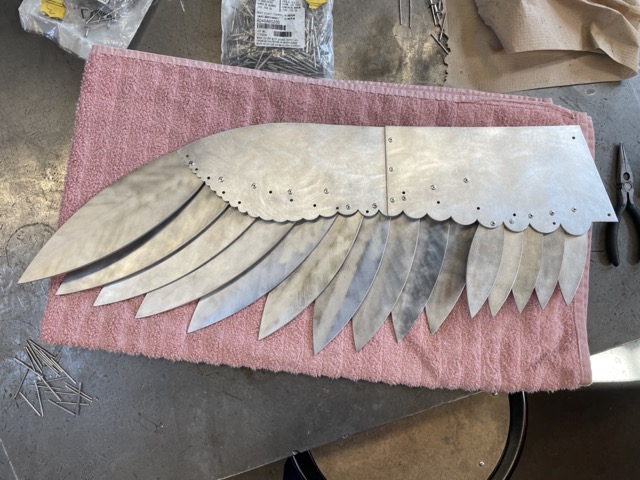
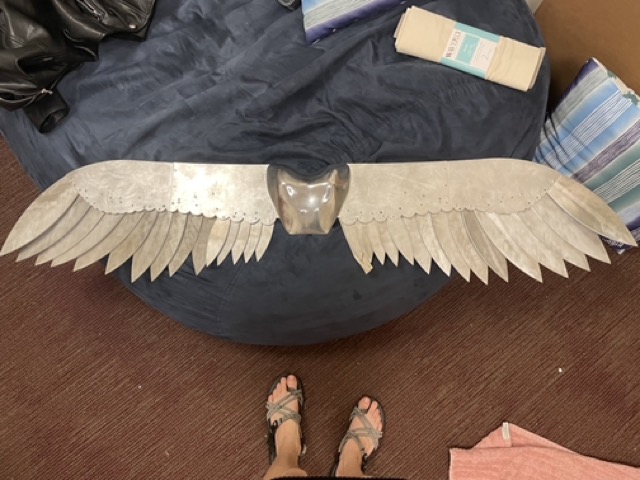
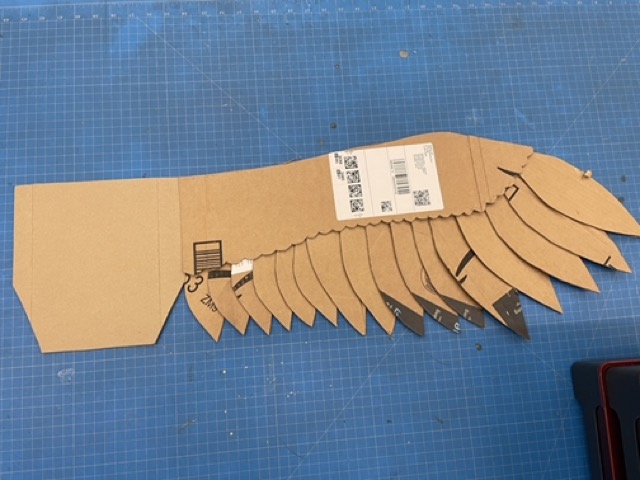 The later concept had been narrowed down to just 32 feathers total, less than half of what I had originally imagined. The wings were still slated to be about as wide as my wingspan, give or take a couple of inches. I created a cardboard protoype to check the sizing and begin to pattern the pieces. I ended up choosing to just make three different size feathers and position them on the wing to stagger the visible lengths. I also had to start thinking of what the backpiece should look like. I wanted it to evoke the back muscles of a bird that are used to move and use the wings which meant it had to be quite organic. I originally wasn't sure how I was going to make that work, as the CAD I had been doing up until this point consisted of geometric shapes and strict constraints.
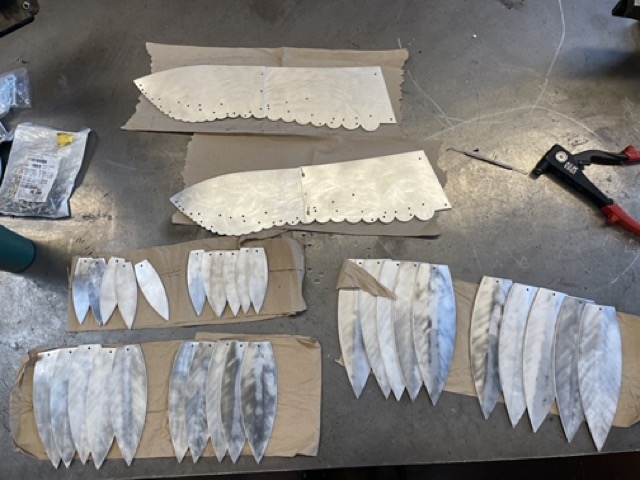
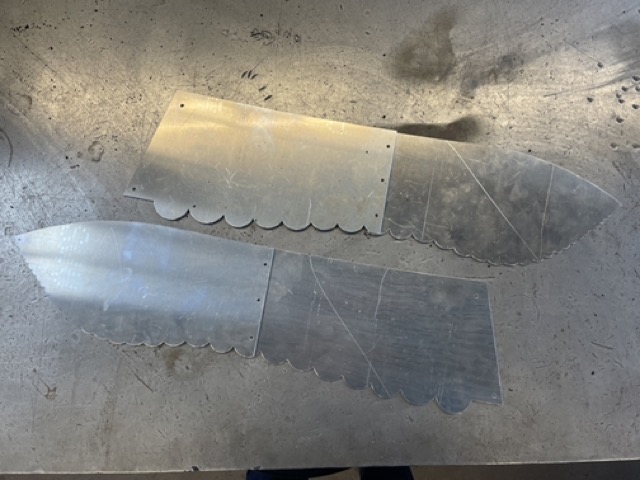
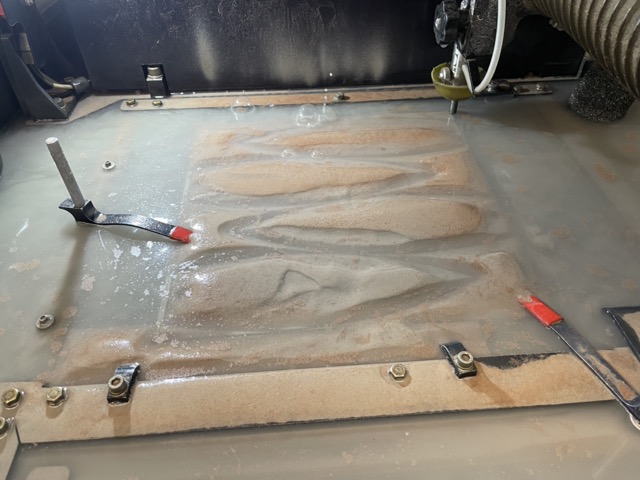 After measuring and prototyping to make sure pieces would be the correct size, I started cutting out the feathers, upper wing sets, and a connection piece that would affix everything to the cast backpiece. I had also originally wanted to curve the feathers, be after a couple of tests, decided that I preferred the flat feathers, as they stakced better and added the dimensionality I wanted to the wings. I cut the sheet on both a waterjet (see left) and a high powered laser cutter. I then sanded out all the sharp edges, except the feather points, and finished eahc piece. The finishing took far longer than I had anticipated, as all of the pieces had to be taken to a low grit to look consitent, and then the feathers were pin finished, where each feather took an average of about four minutes (yes I counted).
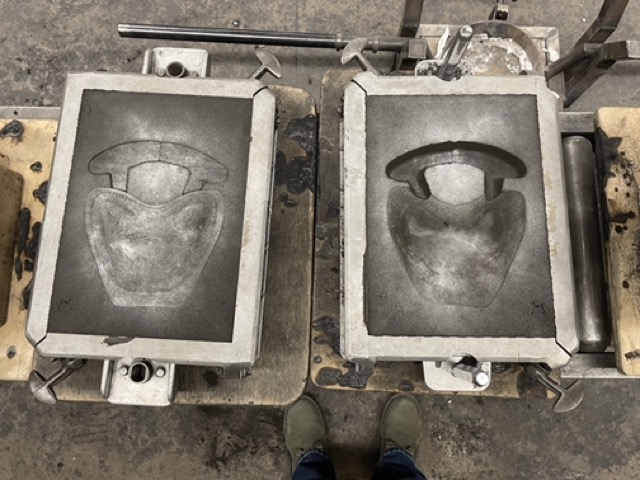
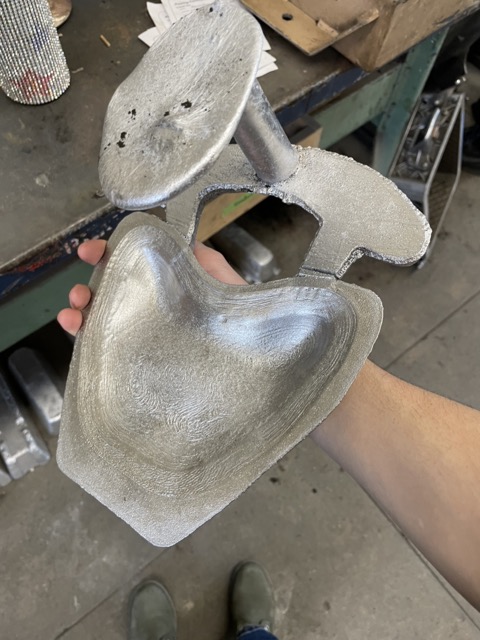
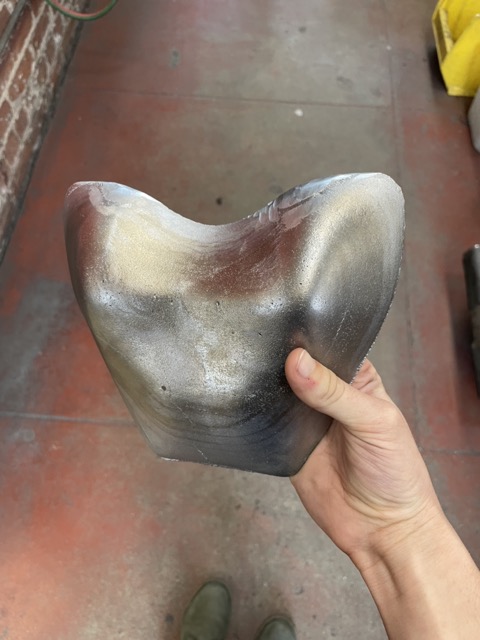
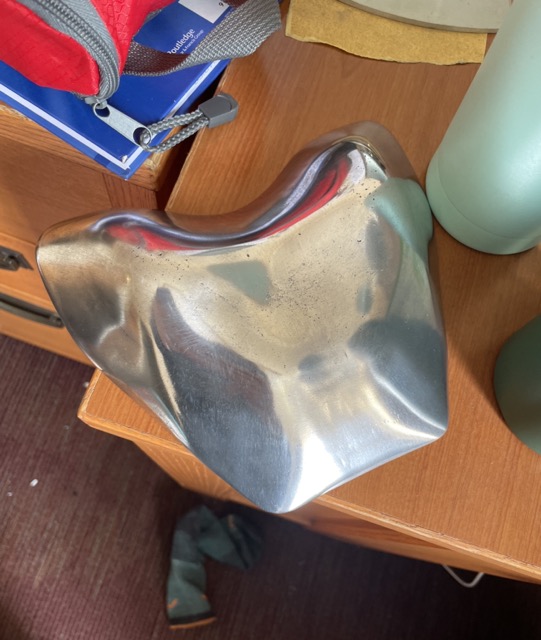 The cast backpiece was a bit of an adventure. Modeling it in CAD took me quite a while, as I'd never used the form process before. I also wanted to be able to machine the back, make it more easily castable, and keep it relatively flat against my back, so I had to do more slicing and processing to the model, especially as I was constantly changing the form. THe first time I tried to print the model it was about 50% the size I wanted. And when I managed to print the correct size, the printer disconnected in the middle and I had to glue two pieces together to finish it. Luckily for me, the organic nature of the piece made it pretty easy to ram up, and the first cast turned out well enough that I used it in the final piece. I wanted to emphasize the contrast with the texture and form of the wings, so I took it to a pretty high polish.
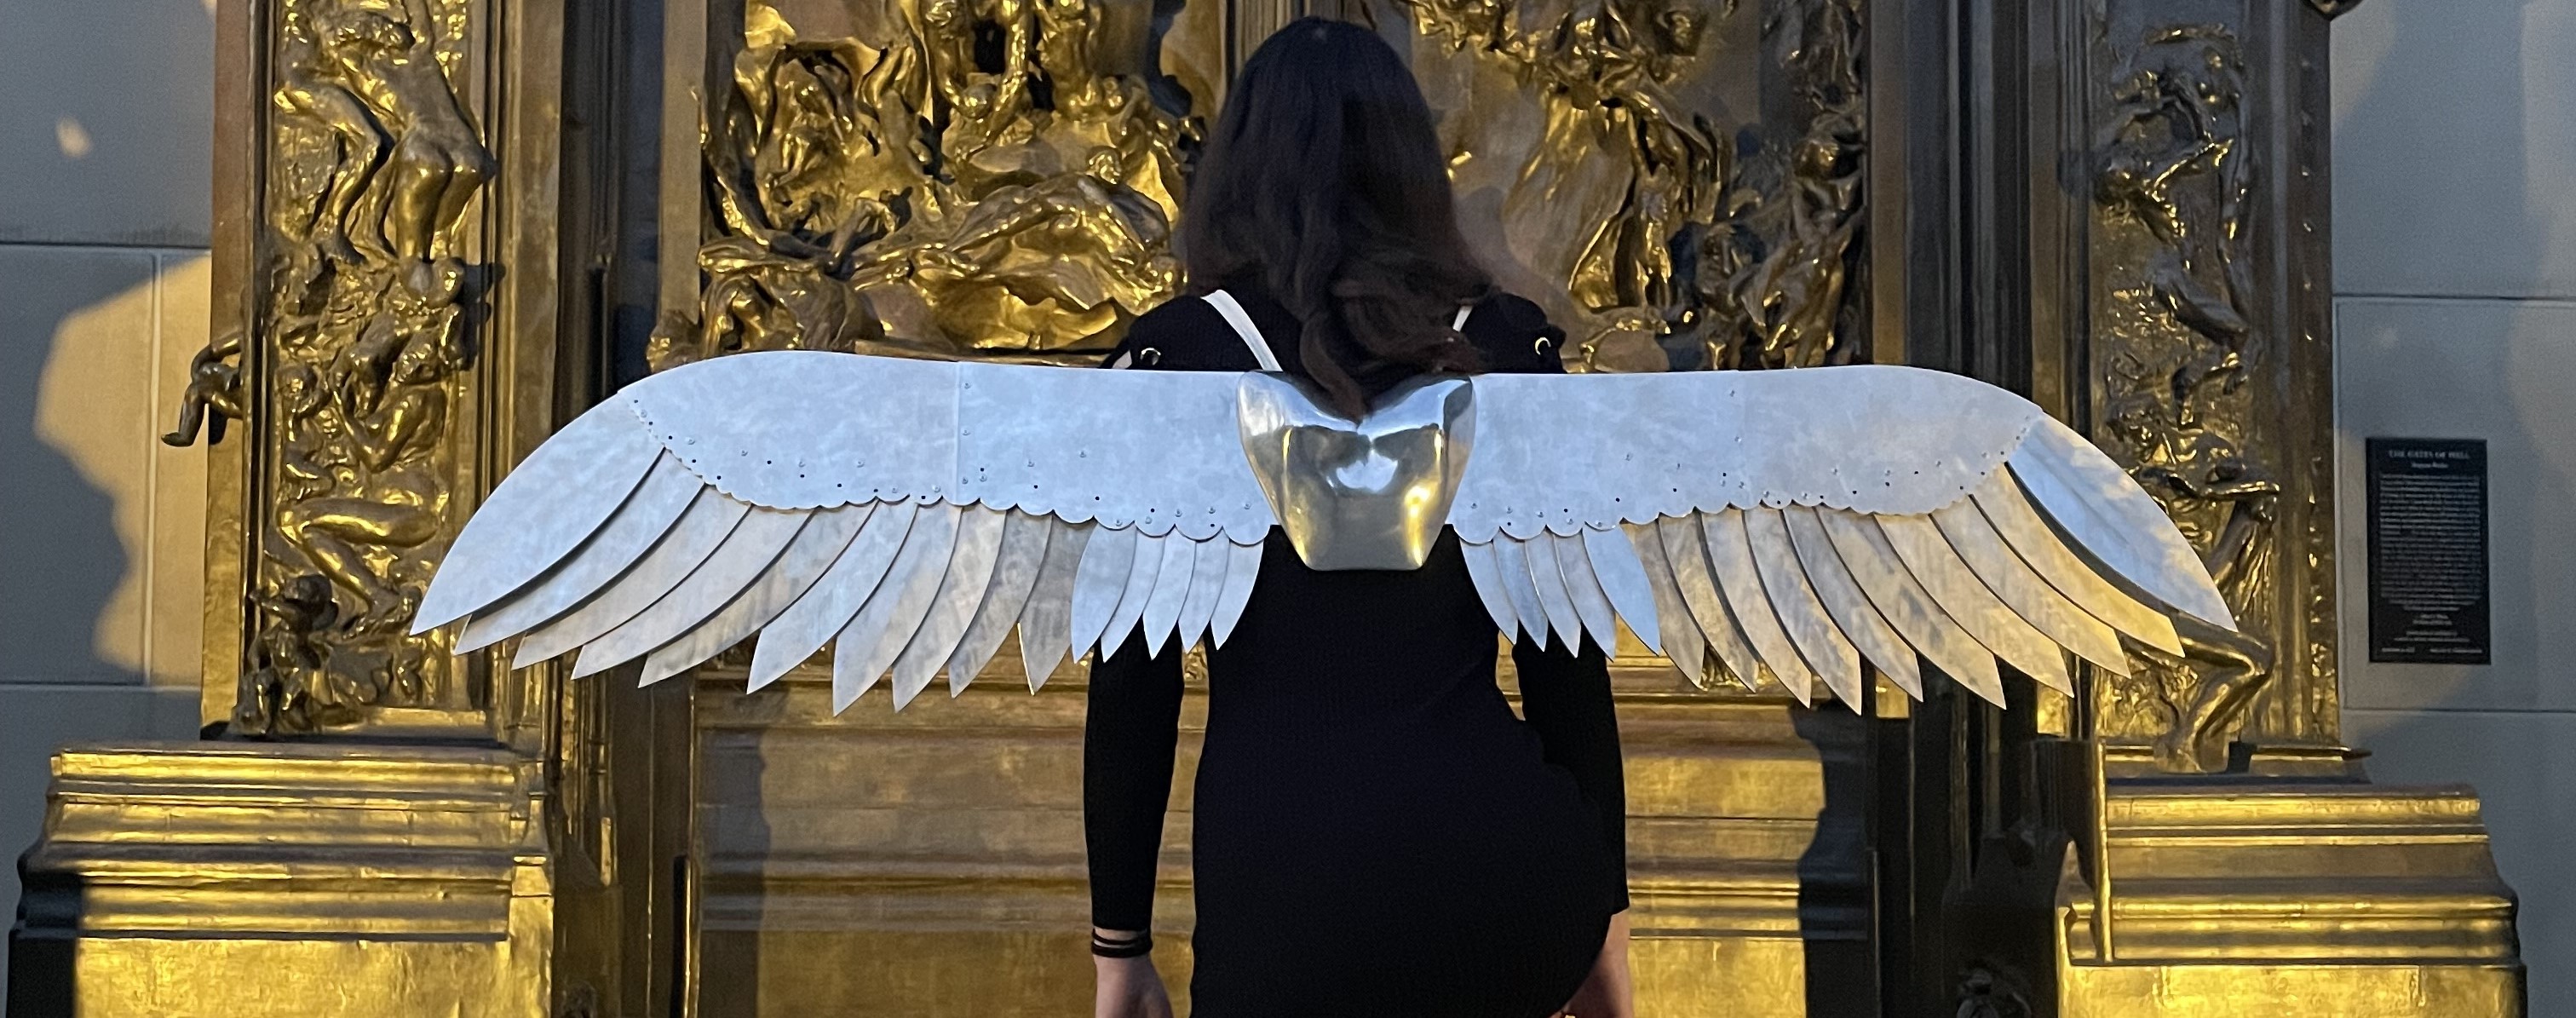
 Because of the size of the project, and the number of pieces I had to assemble, I had to finish all the pieces before connecting them together. Of course, this makes the connection process somewhat nervewracking because I didn't want to mess up the finishes I had spent so long on. All of the sheet metal pieces were to be riveted together and screwed onto a back plate, which then screwed onto the cast backpiece. The backplate takes most of the weight of the wings, hopefully keeping the helicoils in the cast piece in pretty good shape. The very last piece to this project was sewing a couple of straps from some scrap cotton I had. These had to be hand sewn onto the backplate because of their awkward positioning.
A collection of photos from the course of the project
First concept sketch for the project
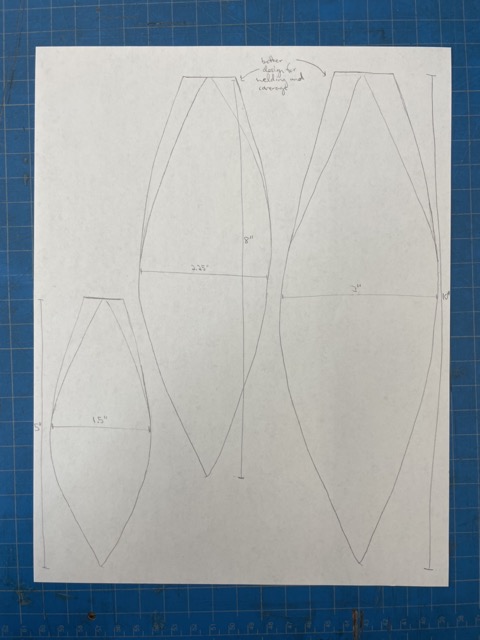
Feather dimension sketch
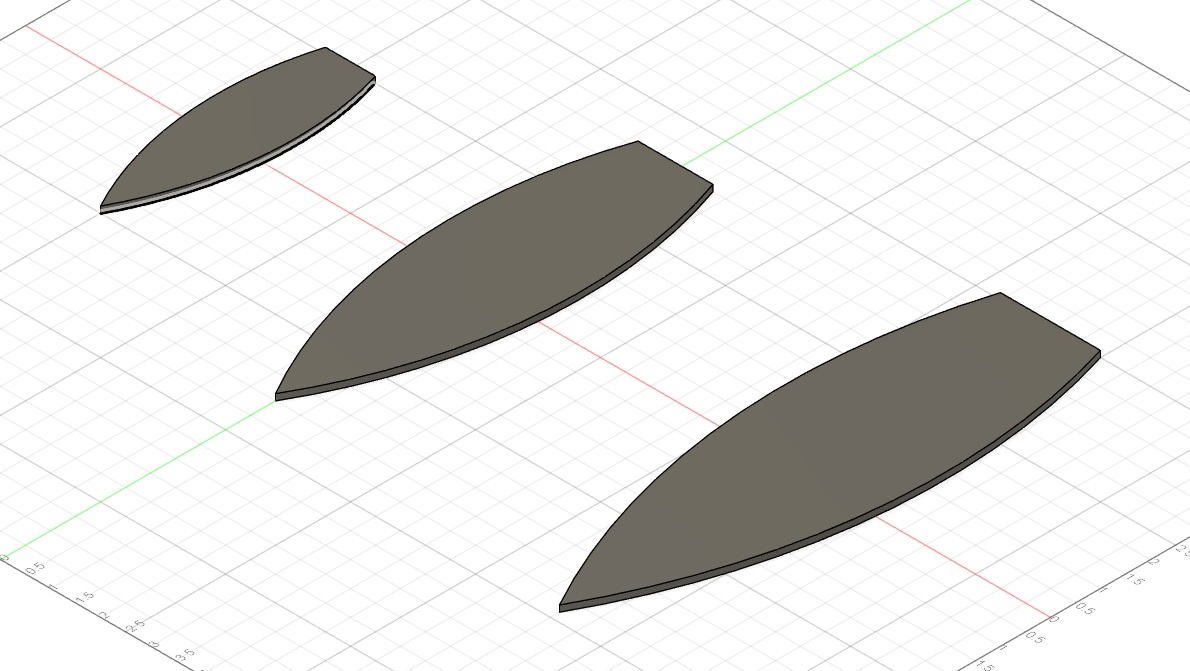
Modeling for feather sizes
What the feathers look like right after the waterjet is finished

A set of feathers, just out of the waterjet
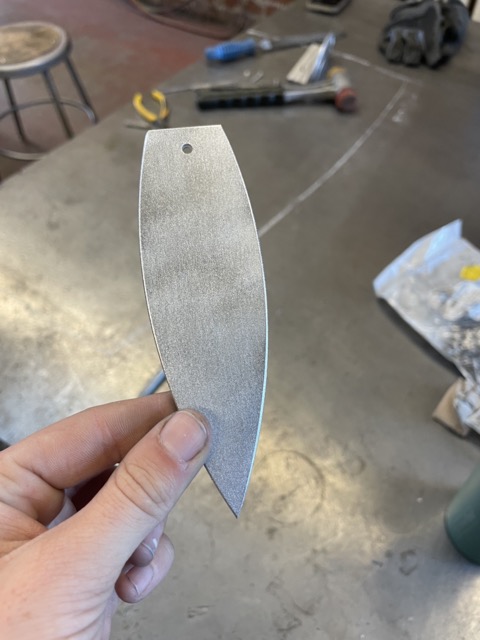
Small sized feather, finished
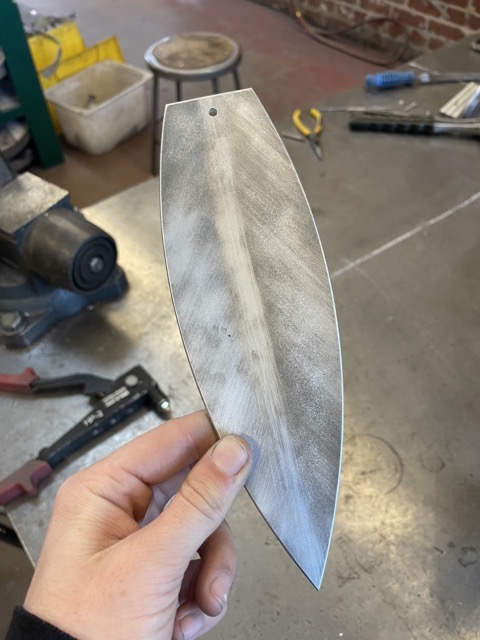
Mid sized feather, finished
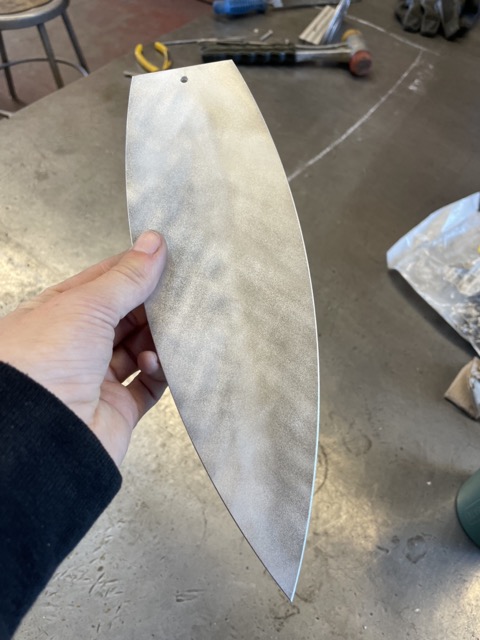
Large sized feather, finished
Upper wing pieces matched together
All of the sheet pieces finished
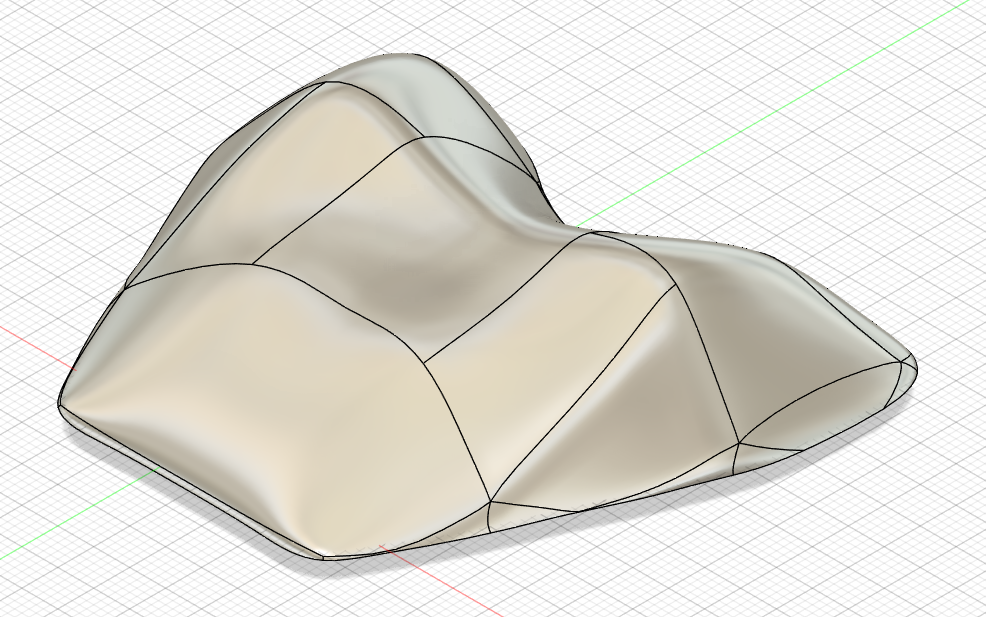
CAD form for the cast backpiece

Fixed mold
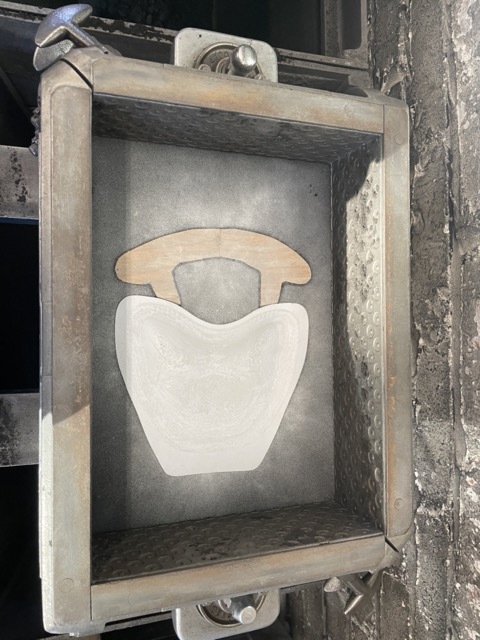
Mold in the sand
Mid ram up
Freshly cast piece
Cast piece cleaned and cut
Polished cast backpiece
One full wing
Fully finished back
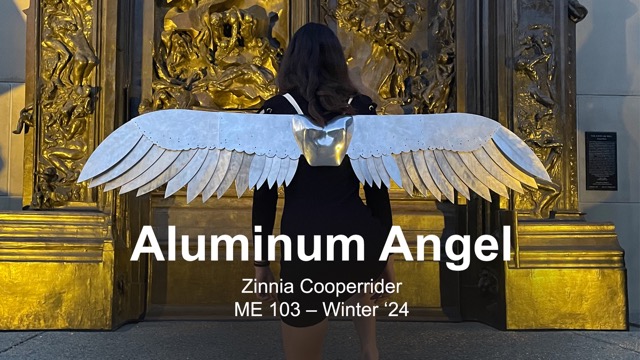
Final project poster